iGPU(vGPU) Passthrough on MS-01: Proxmox, Ubuntu, and Plex Docker Transcoding
Pass through the Intel Iris Xe iGPU as a vGPU on Proxmox to an Ubuntu VM for hardware-accelerated Plex transcoding in Docker on the MS-01.

Hello All!
This is a quick update post. The goal is to passthrough the MS-01 iGPU. Anytime I find it hard to find the answer (Google’ing) to my problem and get it sorted, it seems best to complete a writeup to share once I have a working setup. Hoping someone else won’t have to click through multiple articles to get the answer. My sources for this work are as follows:
Sources and References
From the Level1Techs.com forums, a post by shadowimmage - Link to the post: I915 SR-IOV on i9-13900H (Minisforum MS-01) Proxmox PVE Kernel 6.5 - Jellyfin Full Hardware Accelerated LXC, which then led to Proxmox VE 8.2: Windows 11 vGPU (VT-d) Passthrough with Intel Alder Lake, and finally to strongtz/i915-sriov-dkms.
Below, I have summarized all the steps with screenshots from the Proxmox console and running commands to get the vGPU working and Plex transcoding on Ubuntu 24.04 hosted in Docker.
I will not cover the initial base installation of Ubuntu on Proxmox, as I have other posts you can find that cover that, nor the installation of Docker on Ubuntu. However, I will share the Docker Compose file that is confirmed working while leveraging hardware transcoding.
If you have any questions, please feel free to ask in the comments section below.
Setup Steps
Proxmox Host Commands
Note: I cannot take credit for the following commands for the Proxmox host. This information was entirely sourced from Proxmox VE 8.2: Windows 11 vGPU (VT-d) Passthrough with Intel Alder Lake. If you aren’t using the GRUB boot loader, I encourage you to take a look at the linked post above, which references both Proxmox SystemD Bootloader and Google Coral PCIe TPU.
1
2
3
4
5
6
7
8
9
10
11
12
13
14
15
16
17
18
19
20
21
22
apt update && apt install git sysfsutils pve-headers mokutil -y
rm -rf /usr/src/i915-sriov-dkms-*
rm -rf /var/lib/dkms/i915-sriov-dkms
find /lib/modules -regex ".*/updates/dkms/i915.ko" -delete

cd ~
git clone https://github.com/strongtz/i915-sriov-dkms.git
apt install build-* dkms
cd ~/i915-sriov-dkms
dkms add .

dkms install -m i915-sriov-dkms -v $(cat VERSION) --force
dkms status

cp -a /etc/default/grub{,.bak}
sudo sed -i '/^GRUB_CMDLINE_LINUX_DEFAULT/c\GRUB_CMDLINE_LINUX_DEFAULT="quiet intel_iommu=on iommu=pt i915.enable_guc=3 i915.max_vfs=7"' /etc/default/grub
update-grub
update-initramfs -u -k all

echo "devices/pci0000:00/0000:00:02.0/sriov_numvfs = 7" > /etc/sysfs.conf

reboot now
Ubuntu VM Configuration
If you ran the commands above, you should now be ready to modify the Ubuntu VM to allow for sharing the new virtualized GPUs.
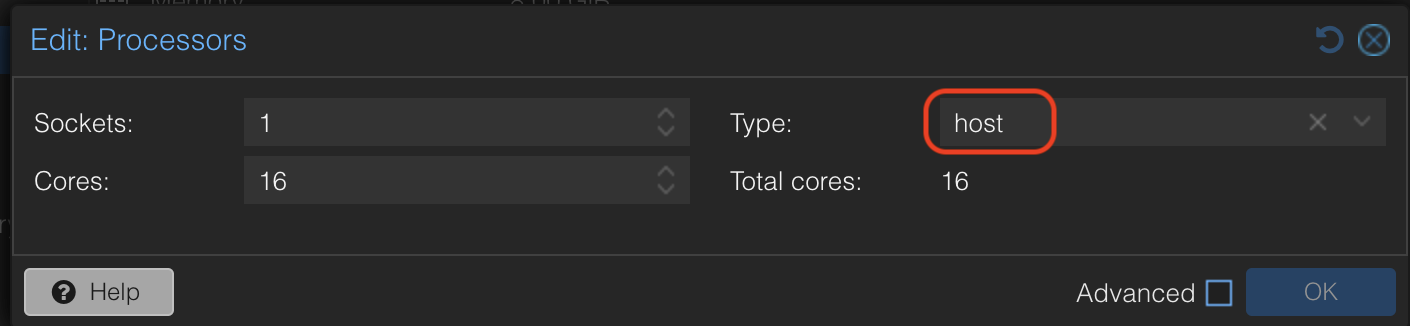
You need to ensure you use “host” when setting up your Processors. I chose 16 cores, but please adjust based on your needs.
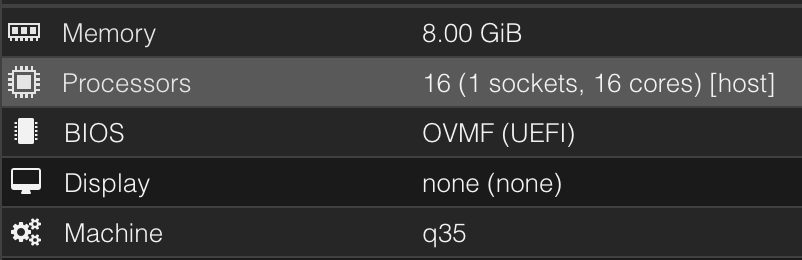
Your BIOS must be OVMF (UEFI), set Display to none, and finally Machine must be set to q35.
Below is an example of what your VM configuration should look like:
- BIOS: OVMF (UEFI)
- Processor: host, 16 cores (adjust based on your needs)
- Display: none
- Machine: q35
Adding the vGPU to the VM
Now, let’s add the GPU to the machine.
If you encounter issues when adding the PCI device to the machine, something might have gone wrong with the above commands, or you might be encountering some strange behavior that has affected me from time to time. This issue typically arises when trying to add the device or if the system isn’t already running. In my case, a simple reboot of the proxmox host fixed this every time. 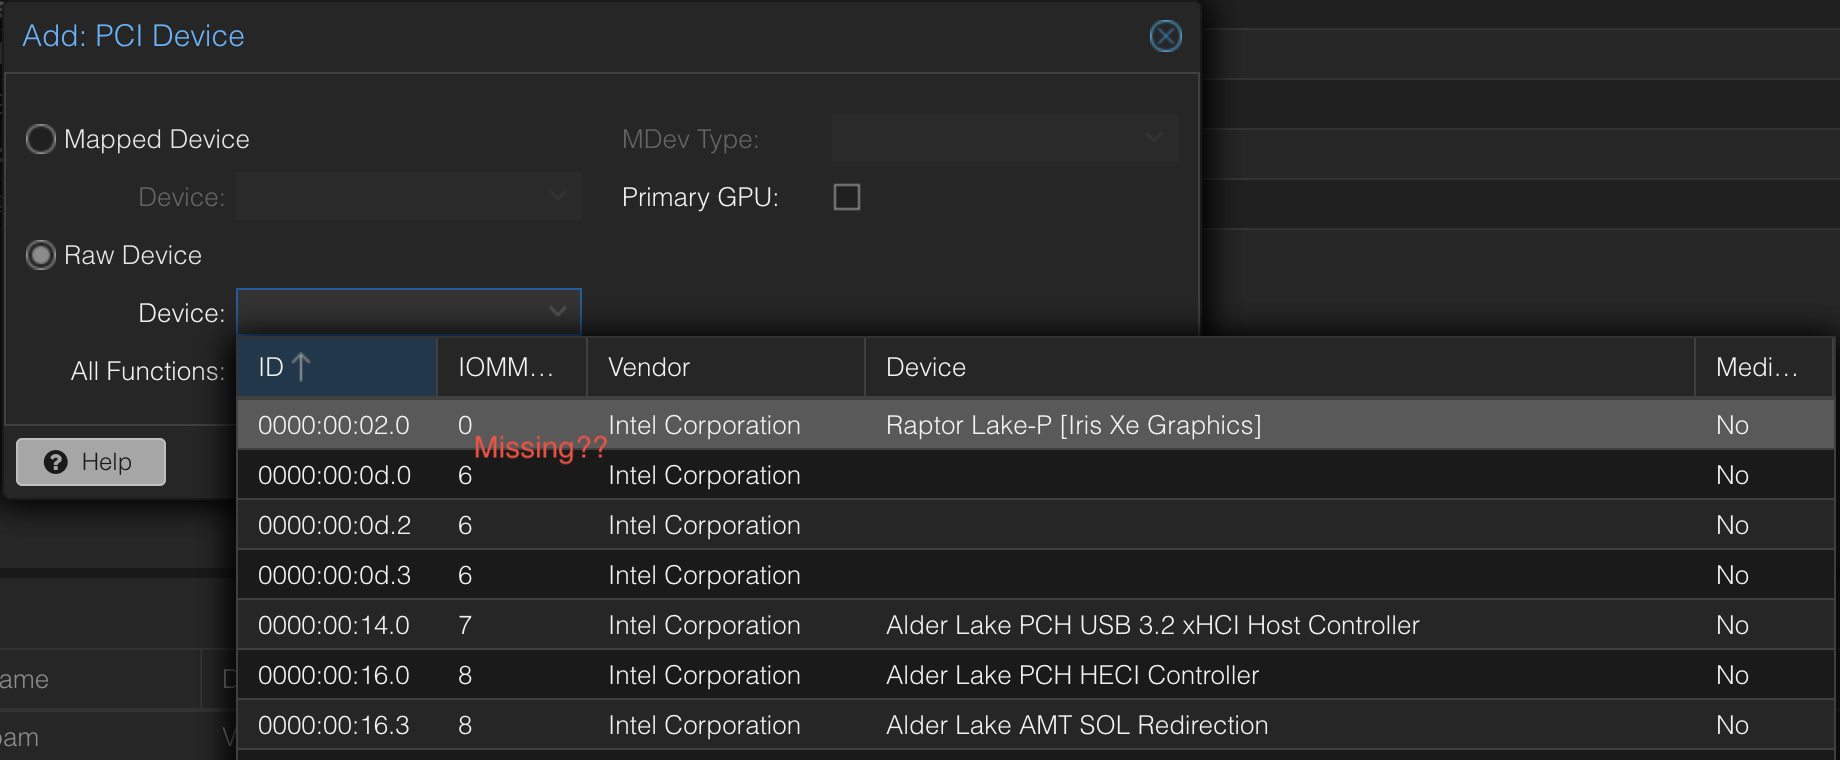
Now that your system shows multiple Iris Xe Graphics adapters, you can add any of the devices shown except 0000:00:02.0. Choosing 0000:00:02.0 will cause the above error/condition as well. Choose any of the 0000:00:02.1, 0000:00:02.2, 0000:00:02.3, etc., ranging from 1-7. Do not select All Functions or PCI-Express(under the advanced section). Doing so is not needed and will again cause issues with the shared GPUs. 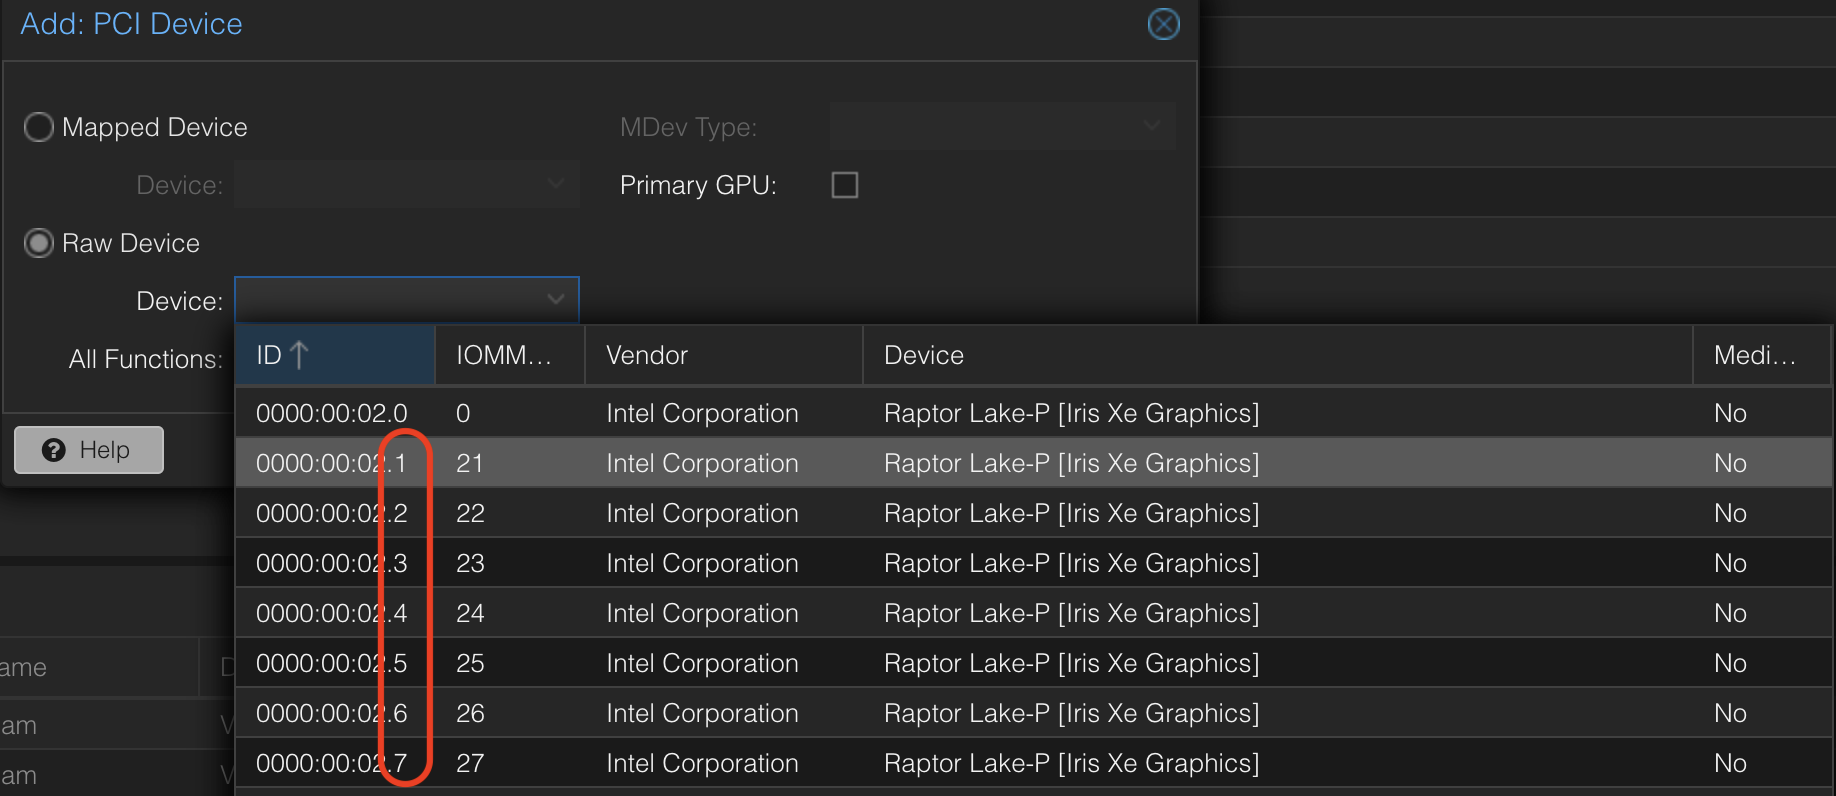
Updating Kernel for vGPU
Now you are ready to run a couple of commands below to update the kernel on the ubuntu VM to support the passed-through vGPU. Again, the commands below are mainly pulled from Derek Seaman’s Tech Blog, with a change to the GRUB_CMDLINE_LINUX_DEFAULT found on the strongtz/i915-sriov-dkms site and adding sudo to the commands.
Below are the commands to run on the Ubuntu VM:
1
2
3
4
5
6
7
8
9
10
11
12
13
14
15
cd ~
sudo git clone https://github.com/strongtz/i915-sriov-dkms.git
sudo apt install build-* dkms
cd ~/i915-sriov-dkms
sudo dkms add .

sudo dkms install -m i915-sriov-dkms -v $(cat VERSION) --force
sudo dkms status

sudo cp -a /etc/default/grub{,.bak}
sudo sed -i '/^GRUB_CMDLINE_LINUX_DEFAULT/c\GRUB_CMDLINE_LINUX_DEFAULT="quiet i915.enable_guc=3"' /etc/default/grub
sudo update-grub
sudo update-initramfs -u -k all

sudo reboot now
Docker Compose for Plex
Now below is the Docker Compose file to run Plex. Focus on areas specific to your environment. Ensure you get your PLEX_CLAIM (make sure you are a Plex Pass subscriber Plex Pass). Comment or uncomment sections based on the use of Traefik.
1
2
3
4
5
6
7
8
9
10
11
12
13
14
15
16
17
18
19
20
21
22
23
24
25
26
27
28
29
30
31
32
33
34
35
36
37
38
39
40
41
42
43
44
45
services:
  plex:
    image: plexinc/pms-docker
    container_name: plex
    restart: unless-stopped
    ports:
      - "32400:32400/tcp"
      - "8324:8324/tcp"
      - "32469:32469/tcp"
      - "1900:1900/udp"
      - "32410:32410/udp"
      - "32412:32412/udp"
      - "32413:32413/udp"
      - "32414:32414/udp"
    environment:
      TZ: "Americas/Denver"
      PLEX_CLAIM: "claim-xxxxxxxxxxxxxxxxxxxx" # Generated here: https://www.plex.tv/claim
      # Comment out the below if using Traefik as your reverse proxy
      ADVERTISE_IP: "http://192.168.1.4:32400/"

      # Uncomment this section if you are using Traefik as your reverse proxy
      # ADVERTISE_IP: "http://192.168.1.4:32400/,https://plex.your-domain.com:443/"

    hostname: plex
    networks:
      - default-network # Network name, change based on your environment
    volumes:
      - "/home/plex-user/plex/config:/config" # recommended to keep local to the Docker host
      - "/home/plex-user/plex/transcode:/transcode" # recommended to keep local to the Docker host
      - "/mnt/plex:/data" # can be an NFS mount
    devices:
      - /dev/dri:/dev/dri # Most important part which tells Docker to passthrough the vGPU to the container.

# Uncomment this section if you are using Traefik as your reverse proxy
#    labels:
#      - "traefik.enable=true"
#      - "traefik.http.routers.plex.entrypoints=websecure"
#      - "traefik.http.routers.plex.rule=Host(`plex.your-domain.com`)"
#      - "traefik.http.routers.plex.tls=true"
#      - "traefik.http.routers.plex.tls.certresolver=production"
#      - "traefik.http.services.plex.loadbalancer.server.port=32400"

networks:
  default-network: # Network name, change based on your environment
    external: true
Plex Configuration
Now that the container is running, a few more tweaks in the GUI and you will be off to the races with hardware transcoding.
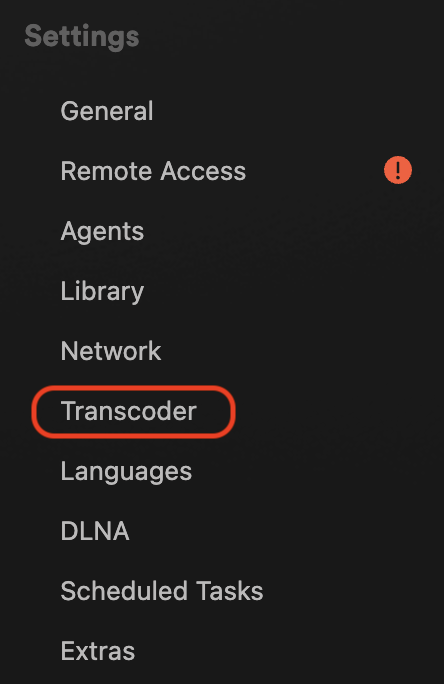
Use the gear icon, which will take you to the settings.

Now select Transcoder.
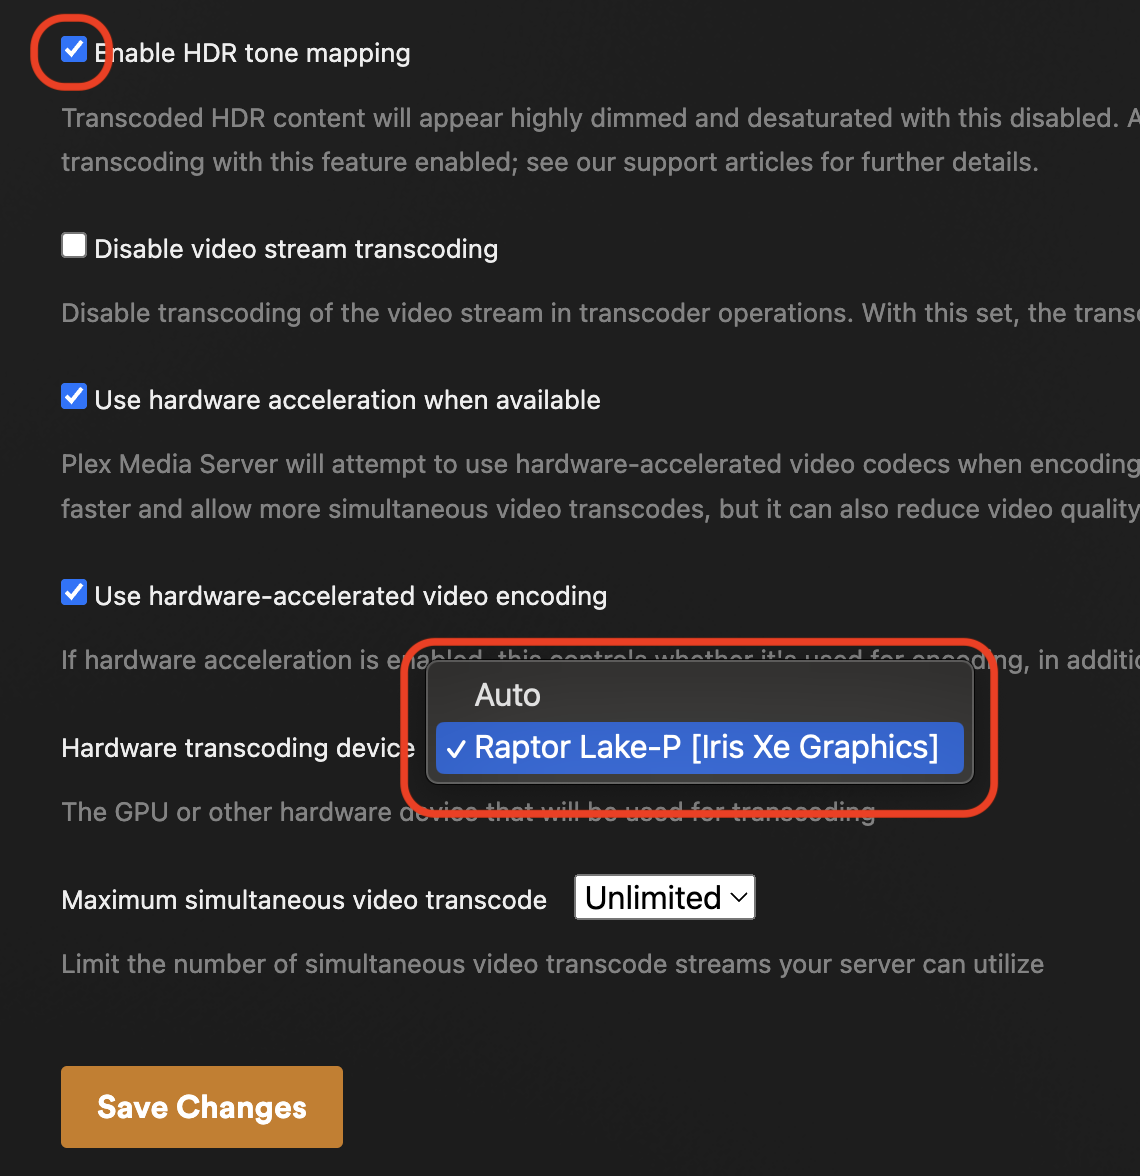
Ensure you have the checkbox Enable HDR tone mapping checked, and under Hardware transcoding device, select the Iris Xe Graphics.
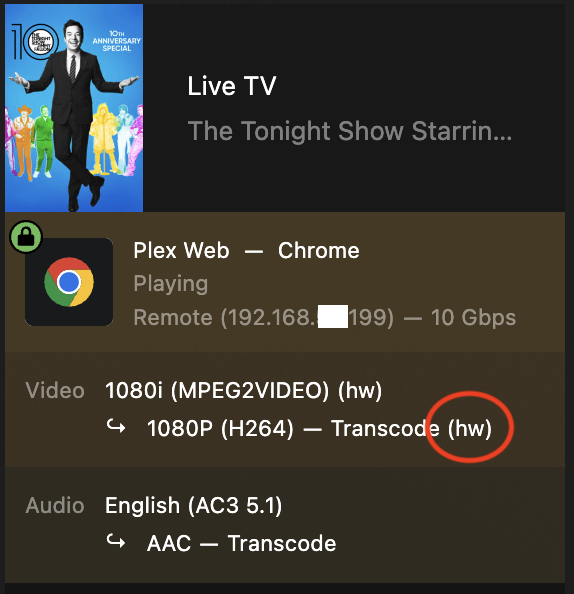
To confirm everything is working as expected, begin some sort of transcoding. I will watch some live TV. Keep an eye on the small (hw) designation. If you have any issues, feel free to drop me a line in the comments section below.
Conclusion
By following these steps, you should be able to set up vGPU passthrough with Iris Xe Graphics on Proxmox and use Plex for hardware transcoding effectively. If you encounter any issues or have questions, please drop a comment below. Happy transcoding!