Seamlessly Setting Up Server Infrastructure for RKE2 with Semaphore UI(SemUI) and Ansible on Proxmox -- QM Commands!
In this post, I will briefly walk through setting up Semaphore UI (SemUI) in a Docker container, then configuring the basics of SemUI to allow for running Ansible scripts, and finally reviewing the steps in the scripts themselves.
In full transparency, I will not be covering the RKE2 installation or setup. However, I will provide a robust guide for using the provided scripts to set up Semaphore UI and deploy the servers that can be used to deploy a 5 virtual server deployment hosted on Proxmox. Let me know in the comments below if you’d like to see me create a walkthrough on RKE2.
Sections
- Docker Compose File for SemUI
- Adding ‘passlib’ to the Container in Two Ways
- Adding Keys to the ‘Key Store’ Section of SemUI
- Adding a Repository to the ‘Repositories’ Section of SemUI
- Adding an Environment to the ‘Environment’ Section of SemUI
- Configuring Your Inventory in SemUI
- Setting Up Three Task Templates
- Configurating your proxmox hosts
- Understanding the Three Ansible Playbooks
Docker Compose File for SemUI
The Docker Compose file is fairly basic. I deploy all my containers with Ansible playbooks, so you will see references like {{ SEMAPHORE_DB_PASS }}, which are the variables I’m passing into the compose files upon the creation of the file. I will not go into detail about Docker Compose, as SemUI provides installation guides here: Installation - Docker.
However, there is one area in the environment section that I would like to highlight: ANSIBLE_HOST_KEY_CHECKING: "False". Without this setting, unless you have taken the time to distribute SSH keys and modify configuration files, you will encounter errors when SemUI attempts to connect to your hosts. I recommend this setting for a home lab environment. If you are considering this for a company or production environment, you should weigh the pros and cons of this approach. For me, this is how I manage it at home to reduce headaches.
1
2
3
4
5
6
7
8
9
10
11
12
13
14
15
16
17
18
19
20
21
22
23
24
25
26
27
28
29
30
31
32
33
34
35
36
37
38
networks:
  spaceterran:
    external: true

services:
  semaphore:
    image: semaphoreui/semaphore:latest
    container_name: semaphore
    restart: unless-stopped
    environment:
      SEMAPHORE_DB_USER: semaphore
      SEMAPHORE_DB_PASS: {{ SEMAPHORE_DB_PASS }}
      SEMAPHORE_DB_HOST: postgres
      SEMAPHORE_DB_PORT: 5432
      SEMAPHORE_DB_DIALECT: postgres
      SEMAPHORE_DB: semaphore
      SEMAPHORE_PLAYBOOK_PATH: /tmp/semaphore/
      SEMAPHORE_ADMIN_PASSWORD: {{ SEMAPHORE_ADMIN_PASSWORD }}
      SEMAPHORE_ADMIN_NAME: admin
      SEMAPHORE_ADMIN_EMAIL: admin@localhost
      SEMAPHORE_ADMIN: admin
      SEMAPHORE_ACCESS_KEY_ENCRYPTION: {{ SEMAPHORE_ACCESS_KEY_ENCRYPTION }}
      ANSIBLE_HOST_KEY_CHECKING: "False"
      SEMAPHORE_WEB_HOST: https://jobs.spaceterran.com
    volumes:
      - type: bind
        source: {{ path }}/playbooks
        target: /tmp/playbooks
    networks:
      spaceterran:
    labels:
      - "traefik.enable=true"
      - "traefik.http.routers.semaphore.entrypoints=websecure"
      - "traefik.http.routers.semaphore.rule=Host(`jobs.spaceterran.com`)"
      - "traefik.http.routers.semaphore.tls=true"
      - "traefik.http.routers.semaphore.tls.certresolver=production"
      - "traefik.http.services.semaphore.loadbalancer.server.port=3000"
      - "traefik.http.routers.semaphore.middlewares=default-headers@file"
Adding ‘passlib’ to the Container in Two Ways
Install from Docker Host Remotely to the Container
First, find the name of your container; in my case, it was semaphore. Use the command: sudo docker ps.
Then, create an interactive shell with the following command:
1
sudo docker exec -it --user root semaphore /bin/ash
Inside the container’s shell, run the command to install ‘passlib’. If there is a prompt to download the package, type ‘y’:
1
apk add py3-passlib
Finally, exit the shell by running:
1
exit
Build a Custom Docker Container with the Latest Semaphore Image
First, navigate to your Docker host and create a new folder where you can store your Docker container. For example: cd /home/docker.
Once there, use your favorite command-line editor. I use Nano. Run the following command to create a new Dockerfile:
1
sudo nano Dockerfile
Copy the following contents to your file:
1
2
3
4
FROM semaphoreui/semaphore:latest

USER root
RUN apk add --no-cache python3 py3-pip py3-passlib
Then, save the file and, while in the same directory, run the command below. Note that my-semaphore-app can be changed to an image name of your choice:
1
sudo docker build -t my-semaphore-app:latest .
Once this completes, you can use your image by replacing this line in the Docker Compose file I shared with you above:
1
2
3
4
5
# from this
# image: semaphoreui/semaphore:latest

# to this
image: my-semaphore-app:latest
If you’re in the same directory, you can simply run the command below to tell Docker to replace the image you are running with this one:
1
sudo docker-compose up -d
Why Do I Need to Do This Anyway?
py3-passlib is required due to a library soon to be deprecated, and I use it in my Ansible script to encrypt the password. I’ll highlight the line later, but if you do not install this, you will receive the warning message below and, possibly, if you are reading this much later, you may get an error that prevents you from continuing.
[DEPRECATION WARNING]: Encryption using the Python crypt module is deprecated. The Python crypt module is deprecated and will be removed from Python 3.13. Install the passlib library for continued encryption functionality. This feature will be removed in version 2.17.
Adding Keys to the ‘Key Store’ Section of SemUI
To add keys to the ‘Key Store’ section of SemUI, you’ll need to first set up your SSH key for your Git repository. Although I’ll use Azure DevOps Repositories as an example, the instructions are similar for most Git repositories such as GitHub or GitLab.
Start by visiting the Microsoft article on how to create a new Git repo in your project, which will guide you through the process of creating a repository and cloning it. When you reach the step to clone the repo to your computer, switch to this section on using SSH key authentication. I highly recommend this method for working with SemUI and the Repositories section. We’ll delve into this more in just a moment.
Now that you have your repository and your SSH key, let’s add it to SemUI. While you can refer to Key Store to follow the official documentation, here are the highlights you should be aware of:
Note: I will assume that you have already logged in and created a project in Projects.
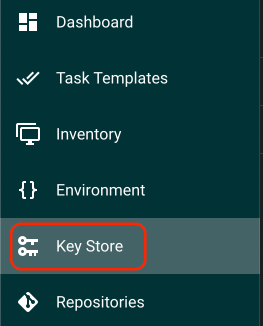
Navigate to the Key Store section:
Now, create a NEW KEY,
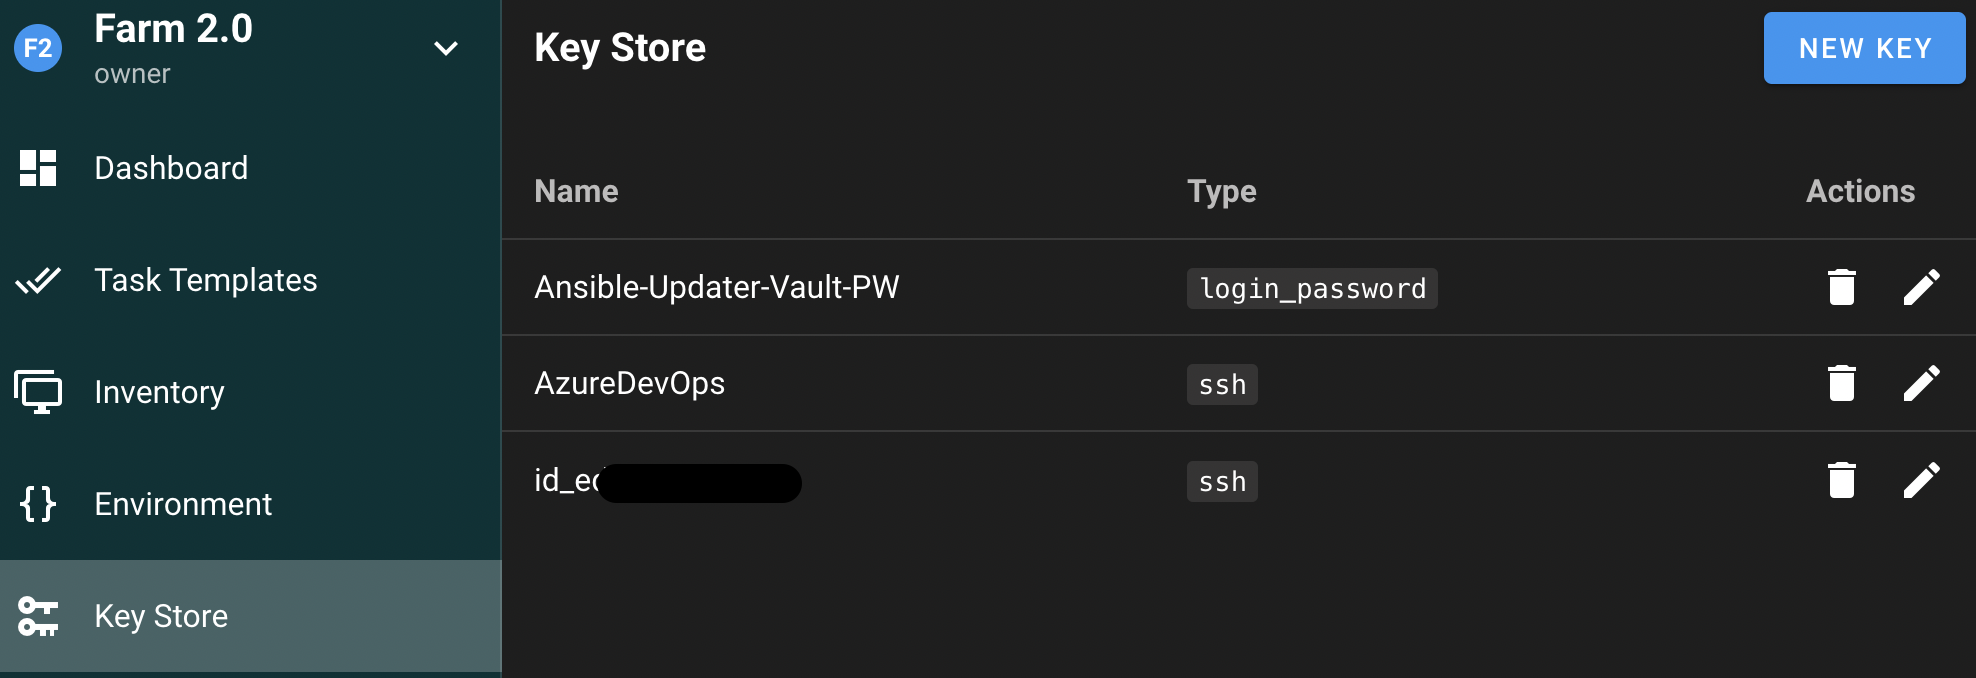
Next, create another key for SSH authentication to each host in your Proxmox cluster. Finally, create a password that will be used in conjunction with the Ansible Vault secrets file, which will be utilized later. Your screen should look similar to the image below.
Adding a Repository to the ‘Repositories’ Section of SemUI
Now let’s add the repository Repositories. This screenshot is from SemUI targeting an Azure DevOps Repository, but you can also add a playbook from a local path mounted within the Docker container. I used this approach for a while, but it’s much easier to check-in code using GitKraken or VS Code, rather than copying files to a Docker container or an NFS path that the Docker host has access to.
Adding an Environment to the ‘Environment’ Section of SemUI
Taken directly from the instructions found here Environment. Personally, I haven’t ever found a need in my use cases to use this section, so my environment file is empty. The Environment section of Semaphore is a place to store additional variables for an inventory and must be stored in JSON format. All task templates require an environment to be defined, even if it is empty. Please see my Environment below:
Extra variables
1
{}
Environment variables
1
{}
Configuring Your Inventory in SemUI
I recommend storing the inventory file within the Git repository of your choice. I do this and store it in the default location inventory/hosts. You can check out the documentation here: Inventory
For the script to run, you will need to identify each Proxmox host that will be used in the cluster. The script will also work if you have only two hosts.
My inventory for this looks like the below:
1
2
3
4
5
6
7
8
9
10
11
proxmox:
  hosts:
    proxmox-amd-mini-0:
      ansible_host: 192.168.1.132
      ansible_ssh_user: root
    proxmox-amd-mini-1:
      ansible_host: 192.168.1.130
      ansible_ssh_user: root
    proxmox-amd-mini-2:
      ansible_host: 192.168.1.131
      ansible_ssh_user: root
Setting Up Three Task Templates
I’ll start off by sharing the documentation for Task Templates. For this demonstration, I will focus on the Task type; however, SemUI is flexible and offers two additional task types: Build and Deploy.
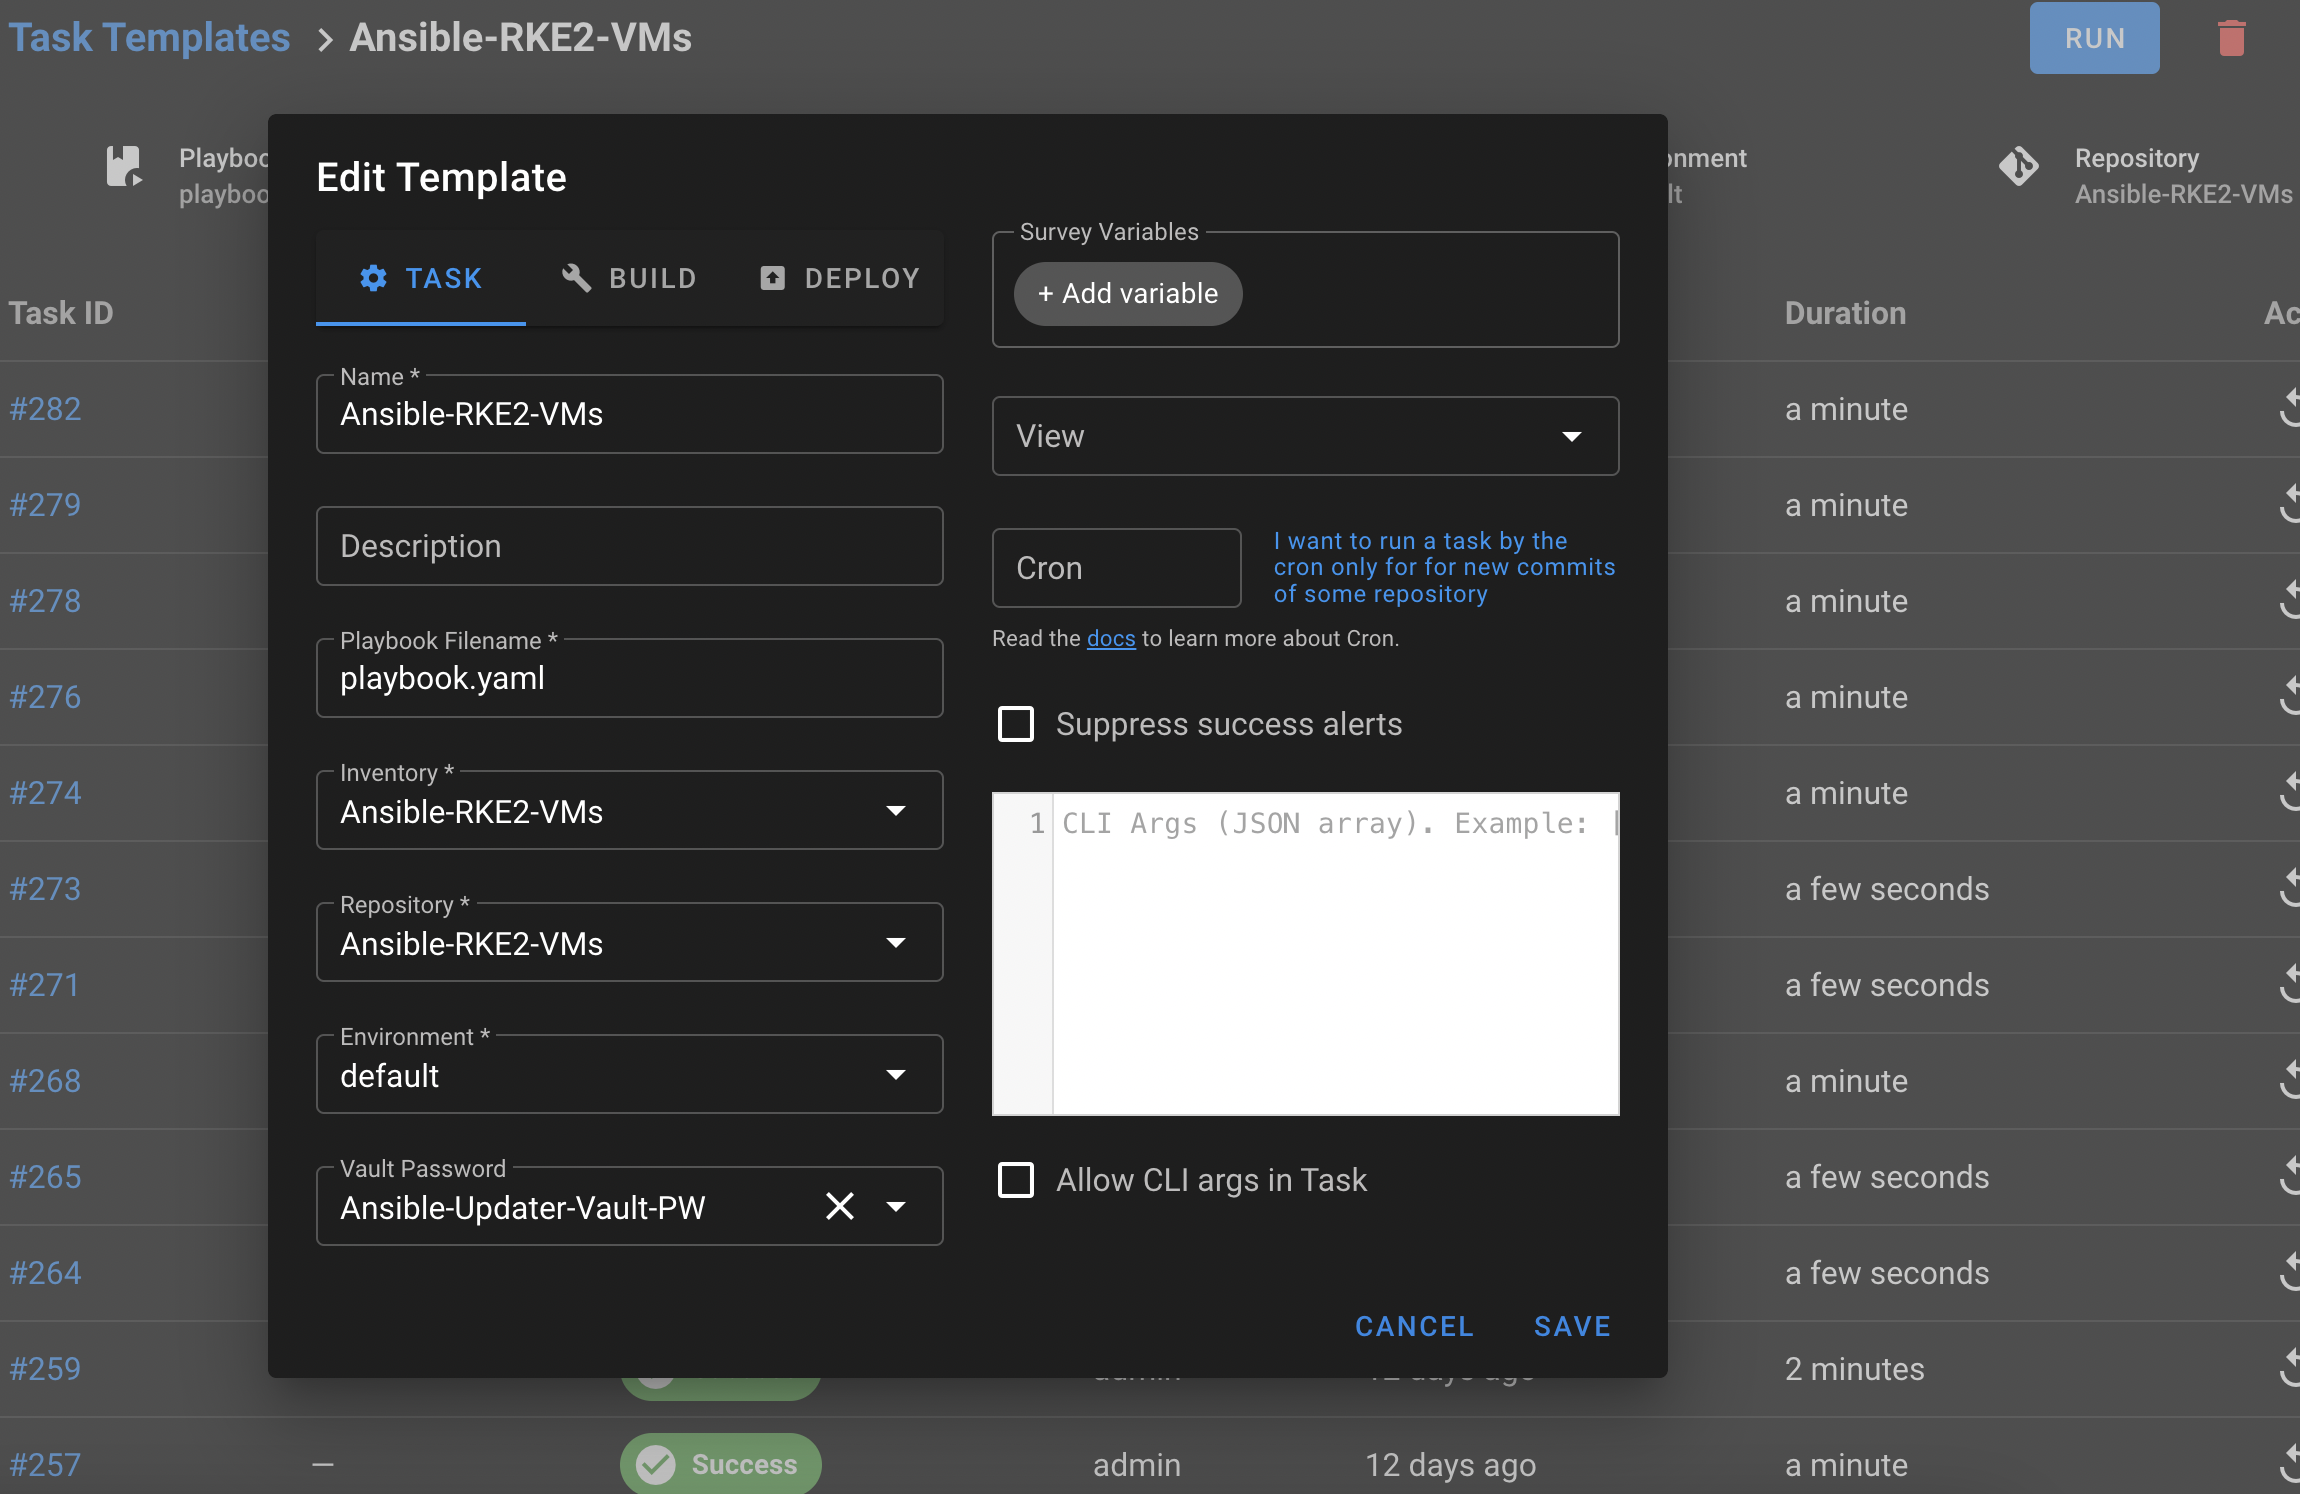
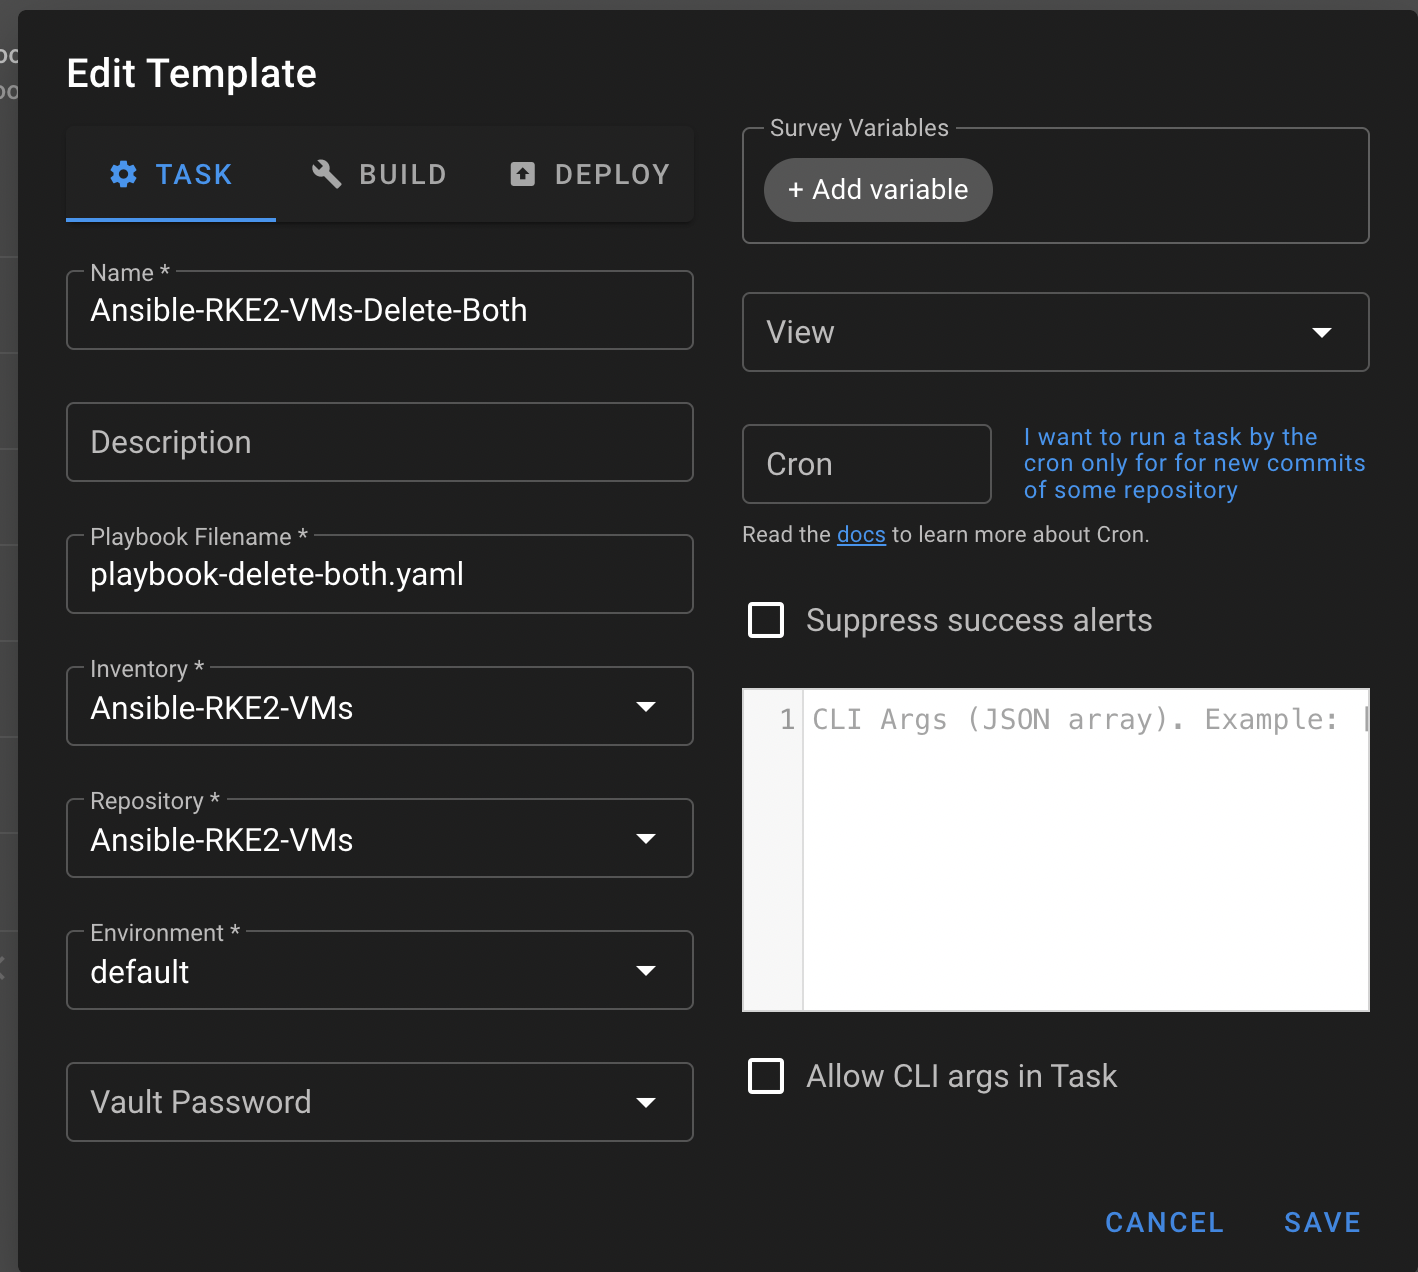
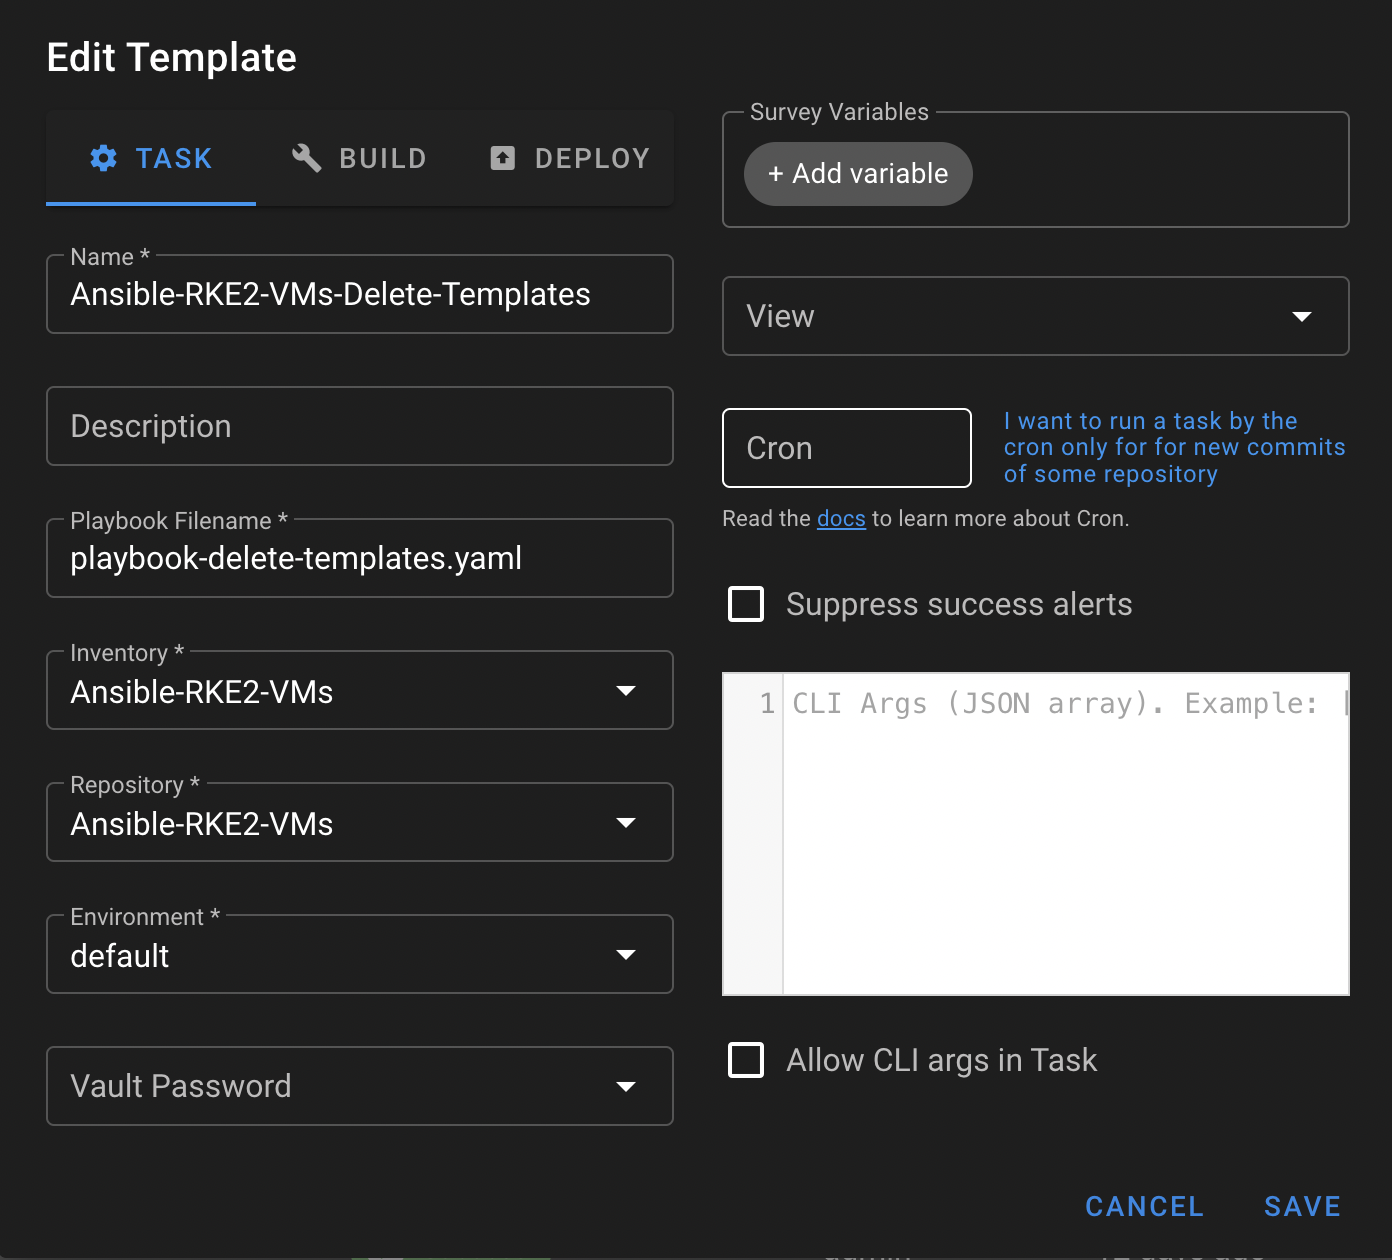
We will combine all the pieces from the previous steps to create three tasks. If you only want to create the tasks for new Templates and VMs, then you will only need to create the Ansible-RKE2-VMs task.
Task: Ansible-RKE2-VMs
Task: Ansible-RKE2-VMs-Delete-Both
Task: Ansible-RKE2-VMs-Delete-Templates
You’ll notice that the only difference is the playbook being called, and that all parts of this project are located within the same repository.
Configuring Your Proxmox Hosts
By default, a Proxmox host will not allow SSH authentication, so we will take the SSH key you stored within the Key Store and use the ssh-copy-id command to push the certificate to the Proxmox host. This allows SemUI to connect and run playbooks against the Proxmox hosts.
Here’s the command structure: the command, followed by the root or admin account, and then the IP address of the host.
1
ssh-copy-id root@192.168.1.132
Understanding the Three Ansible Playbooks
playbook.yaml - create the VMs
This Ansible script facilitates the automated setup of virtual machines (VMs) in a Proxmox environment using a cloud-init enabled Ubuntu server image. Below is a detailed breakdown of the script’s tasks, configurations, and key variables:
Host and Environment Configuration
- Target Hosts: nodes
proxmox-amd-mini-0,proxmox-amd-mini-1, andproxmox-amd-mini-2. - Variables Configured:
proxmox_storage: Storage ID (truenas) where images and VMs are stored.cloud_image_url: URL to download the Ubuntu 22.04 server cloud image.cloud_image_storage: Local storage path (/var/lib/vz/template/iso) where the cloud image is saved.cloud_image_name: Filename of the cloud image (ubuntu-22.04-server-cloudimg-amd64.img).
VM Template and User Data Configuration
- Template and Cloud-Init Settings:
template_name: Base name for VM templates (ubuntu-22.04-).user_data_file: Jinja2 template file (user-data.yaml.j2) for cloud-init user data.user_data_file_storage: Storage ID where the user data snippets are stored (truenas-userdata).user_data_file_storage_path: Storage path for user data files (/mnt/pve/truenas-userdata/snippets).ciuser: Default user for the cloud-init setup (root).
VM Deployment Tasks
- Creating Templates and VMs:
- Deploys VMs using custom roles (
create-proxmox-templateandcreate-proxmox-vm). - Configures VMs with specific settings such as CPU cores, memory, disk resizing, QEMU_AGENT, and UEFI support.
- Deploys VMs using custom roles (
Dynamic Host and VM Management
- Ensures VMs are created on their designated host targets using conditional checks and iterates over a list of VM configurations to apply settings based on the intended role and target host.
playbook-delete-both.yaml & playbook-delete-templates.yaml
Both scripts are designed to manage template deletion effectively, providing a toggle through the delete_templates_only variable that determines whether VMs should be deleted as part of the operation. Because it was simpler, I just created two jobs in SemUI. However, you could easily pass the following setting:
1
delete_templates_only: true  # When true, only delete templates
via the command line:
1
ansible-playbook your_playbook.yml -e "delete_templates_only=true"
Host and Environment Configuration
- Target Hosts: Specifies individual Proxmox nodes (
proxmox-amd-mini-0,proxmox-amd-mini-1,proxmox-amd-mini-2) for targeted operations. - Variable Configurations:
delete_templates_only: A boolean flag that, when set totrue, restricts the deletion process to templates only.
Deletion Tasks
- Deleting Templates:
- Executes a task that includes the
delete-proxmox-templatesrole, which handles the removal of specified Proxmox templates.
- Executes a task that includes the
- Conditional VM Deletion:
- A secondary task involves the
delete-proxmox-vmsrole, which is executed only if thedelete_templates_onlyflag is set tofalse. This ensures VMs are deleted only when template deletion is not the sole objective.
- A secondary task involves the
vm-configs.yaml
This file is used to store your VM configuration, and it’s flexible; it can be the configuration file for a specific environment or just used to automate the addition and deletion of all the VMs running on your Proxmox hosts.
VM List and Configurations
- Dynamic VM Configuration:
- Each VM is defined with specific hardware and network settings, including unique identifiers (
vm_id), names (name), MAC addresses (mac), VLAN numbers (vlan), and Proxmox target nodes (target). - Template IDs (
vm_template_id), CPU cores (cores), memory allocations (memory), disk resizing options (resize_disk), QEMU agent settings (QEMU_AGENT), and UEFI statuses (UEFI) are also specified.
- Each VM is defined with specific hardware and network settings, including unique identifiers (
In Closing
First off, I would like to say that while I wrote this as more of an exercise in using Ansible to leverage the QM Proxmox commands to create and delete the VMs needed to create a REK2 cluster, there are plenty of playbook optimizations or streamlining the creation and deletion roles that could be made. However, if you just want to get up and running quickly with 5 VMs, this playbook reduces the barrier to entry and saves the time of downloading and creating servers.
I would love to hear from you on areas you wished would be done differently or could be optimized. I would also like to point out that much of what I have accomplished with the ansible.builtin.shell and qm Proxmox commands can be completed via community.general.proxmox.
Here is the link: Github to the repo to get you started. Good luck!

